Week 2 – Computer-Aided Design
Overview
For week 2, we were tasked to learn 2D and 3D raster and vector graphics. A number of software tools were introduced to us, including Autodesk Fusion, FreeCAD, Inkscape, Gimp, Blender, etc. We were to model a possible final project using two or more of these tools, and also to learn how to compress our images and videos to be submitted.
2D Raster Graphics
Raster images are made up of pixels, meaning that they become jagged and rough when zoomed in. This type is suitable for non-lineart images. However, for the purpose of laser-cutting, vector graphics should be used.
GIMP and Photoshop are common raster graphic tools. I have used Krita before for digital art and the initial sketch I have posted in Final Project was made using Krita. However, for this project, as GIMP was a recommended tool, I downloaded and tried it out.
I watched this short tutorial to learn the basics of GIMP. It is no different than any other digital art tools like Krita, except in the interface, which took some time to get used to. Using GIMP, I made another sketch of my final project idea.
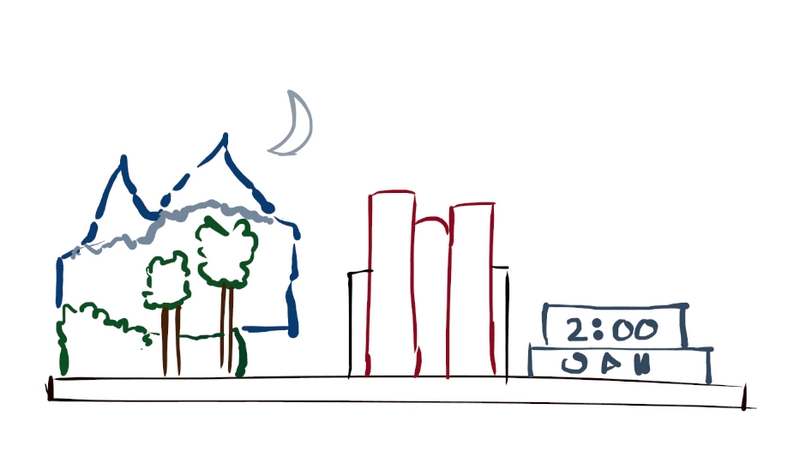
2D Vector Graphics
Unlike raster, vector graphics are stored in lines and curves, and are not resolution-dependent, producing scalable images. Adobe Illustrator is a popular vector graphics tool, and one that I have sufficient experience with. I have learned this tool following GFXMentor's Playlist, a very extensive but easy tutorial for beginners.
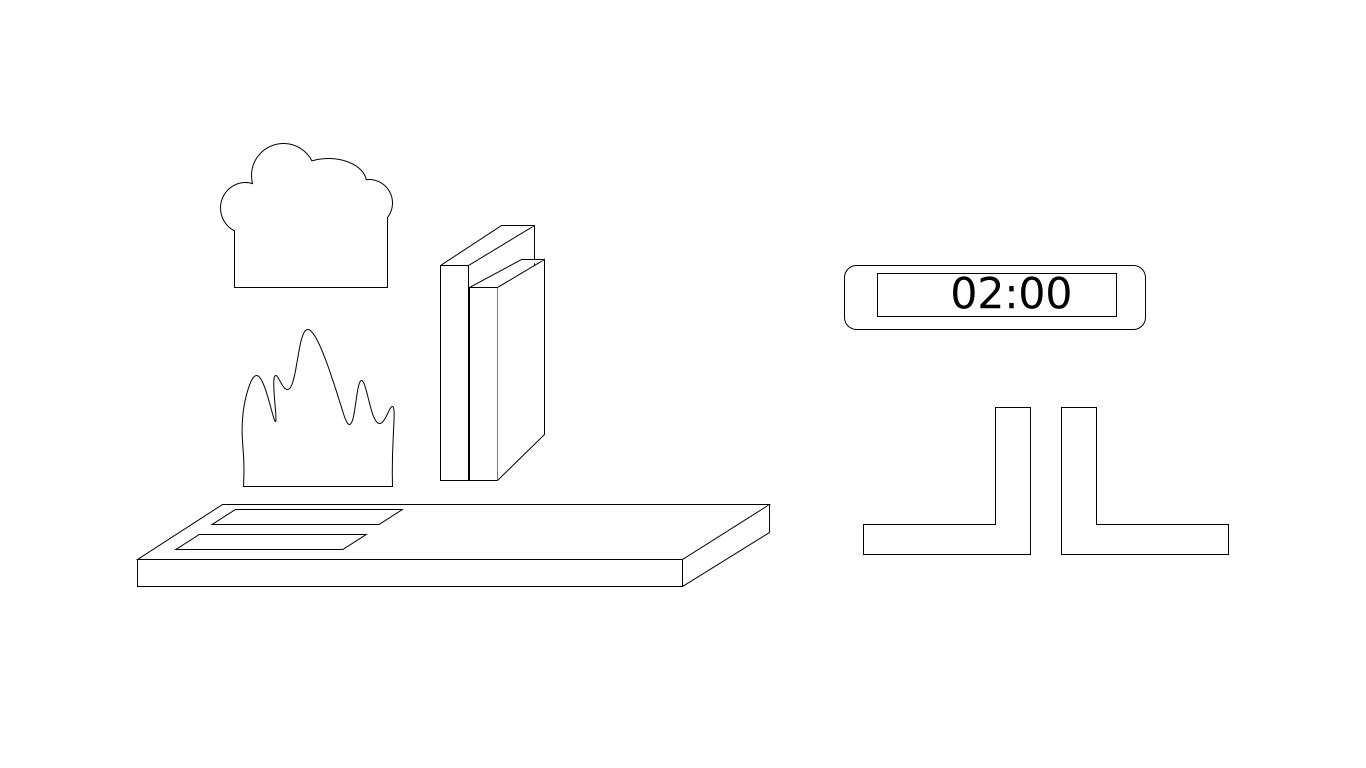
I made a simple sketch of my project using Illustrator, mainly utilising the rectangle and pen tools. I made a base for the shelf, added two slottable pieces, some books, bookends, and a rough idea of a reading tracker.
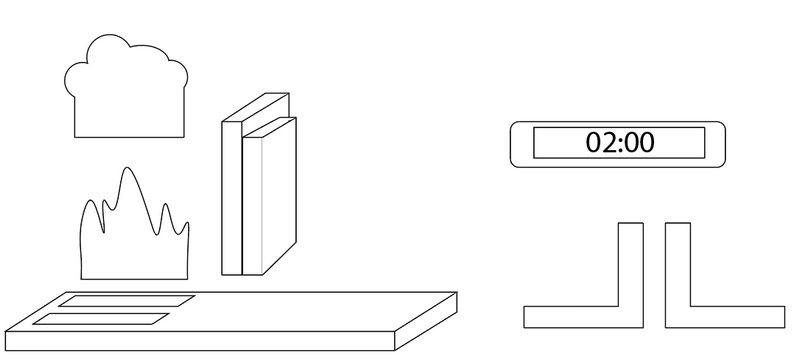
For the piece representing mountains, I used the curve tool and for the trees, I used the shape builder tool. I did the latter by drawing some circles and removing the inside lines.
3D Modeling
I have had zero experience with 3D design prior to this course. We were instructed to download and install Autodesk Fusion for our class, although we had other options for 3D design, such as Blender, FreeCAD, and Onshape. As far as I understand though, Fusion is suitable for printing purposes while Blender is for creating art, for example, for games. Our instructor Gleb provided us with a brief overview of how to use Fusion during the lecture.
Later I watched a beginner's tutorial to learn some more basics about Fusion. The tutorial did not demonstrate anything that was not already covered in class. At the end of the video was a section about Constraints but the YouTuber failed to explain it properly and his instructions were too vague for a beginner. For example, he didldn't clarify what buttons he was clicking exactly and in what order, so a lot of it was left to guesswork.
During the lecture, we also learned how to make a design in 2D using the sketch screen, and then extrude it to turn it into a 3D model. I think most designs can be done using either 3D shapes or by extruding a 2D sketch, and it depends entirely upon personal preference. Although for a more complicated design, a 2D sketch may be the more preferable option.
To design a 3D model for my project, I first created a new scene. It comes with a grid that can be toggled on and of. In the top-right corner is a cube which you can use to change the orientation and view of your design.
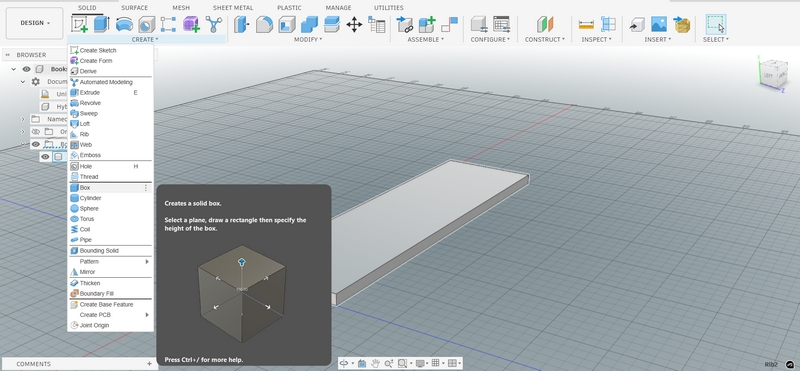
To design my shelf, I first created a box by clicking Create, and choosing Box. It then gives the option to choose one of the three axes. I chose the horizontal axis. Fusion provides instructions for each step, so it is easy to understand what to do next. For a box, I need to choose the origin point first, and then drag the lines until I am happy with the size. Another option is to manually input the dimensions of the box.
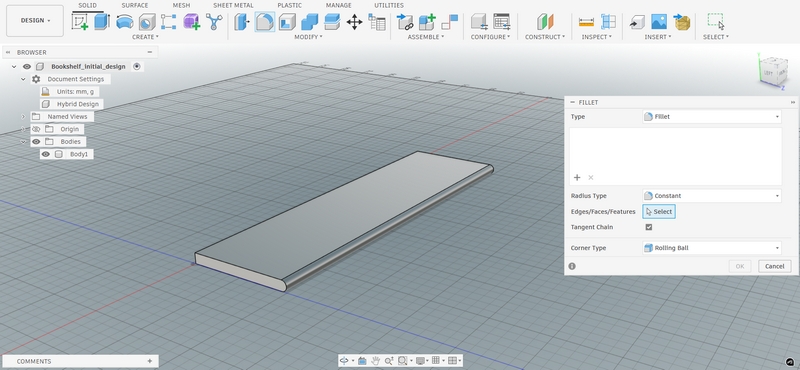
Next, I used the Fillet option to shave off one edge of the box.
I wanted to make slots on the shelf next. For this, I decided to use the Align tool, which was shown to us in class. I created a long, narrow box that would be the slot. What Align does is essentially align the chosen side of object A, in this case the top of the base, with the chosen side of object B, in this case, the bottom of the slot. Then I reverse the direction of the rectangle so it goes inside the box and creates a slot.
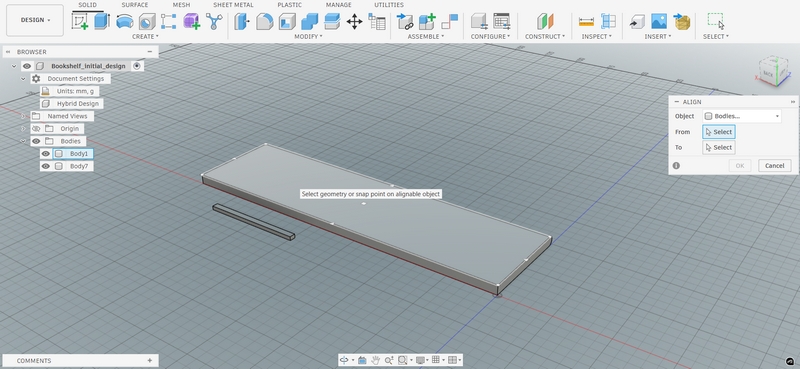
However, the process did not work. The narrow rectangle did not move from the position but Fusion said that the Align process has taken place, and gave an error message when I attempted to delete the slot. After some more failed tries, I decided to use the sketch method.
I did this by selecting Create -> Create Sketch. Then I had to choose one side of the object, which would become the canvas for sketching, turning the 3D model into a 2D scene.
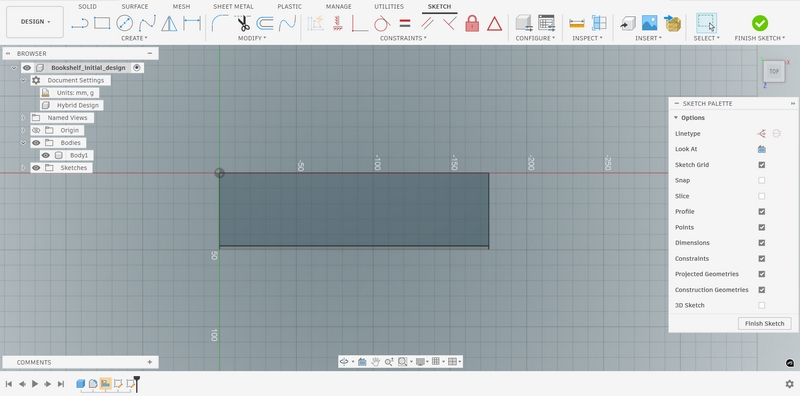
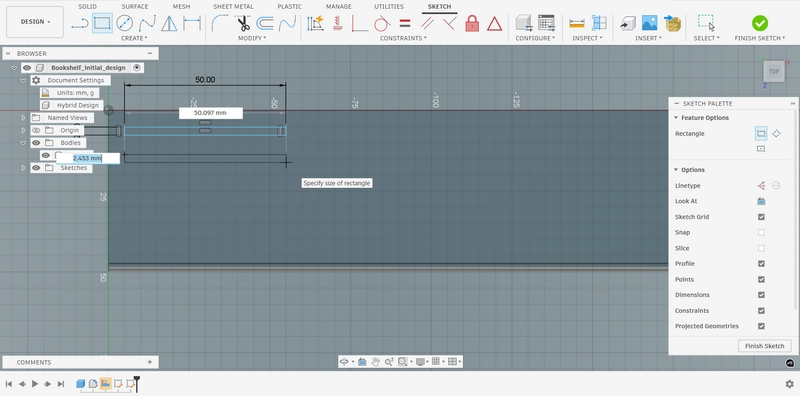
I made the slots by drawing four narrow, equal-sized rectangles on the surface. In hindsight, it would be good design decision to use constraints to make sure the slots are evenly spaced on the base. However, at the time of making this, constraints were still a very complicated topic for me, so I chose not to go in that direction.
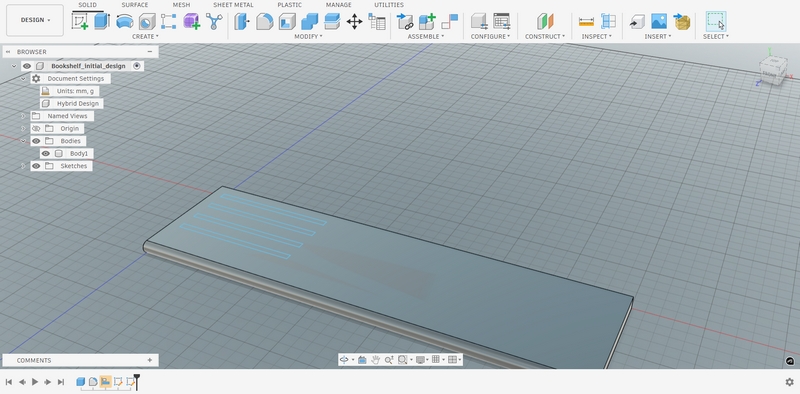
After clicking "Finish Sketch", the 2D diagram was turned back into the 3D object. I could now use Extrude to drag the rectangles to produce slots inside the base.
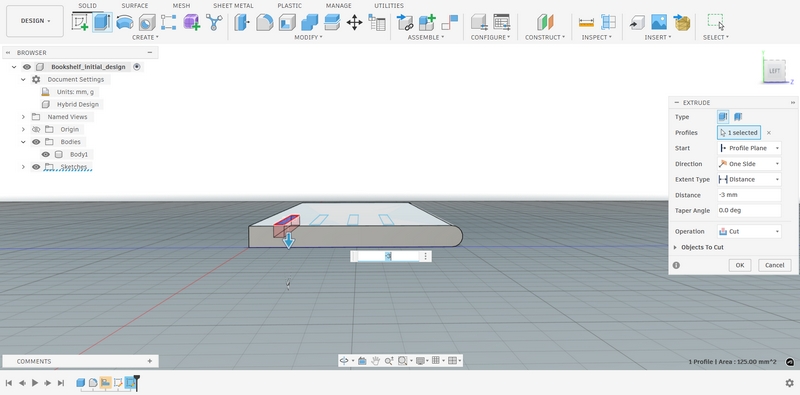
Next, I wanted to make the support for the base that would be attached to the wall. For this, I used the sketch method again and made two rectangles, which I then extruded and made into a vertical support.
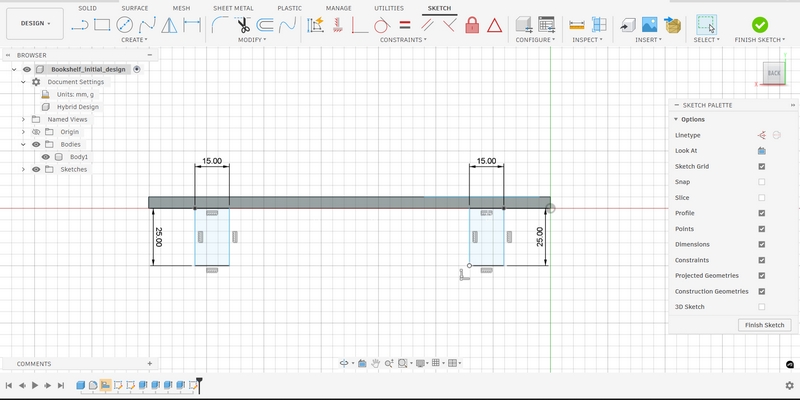
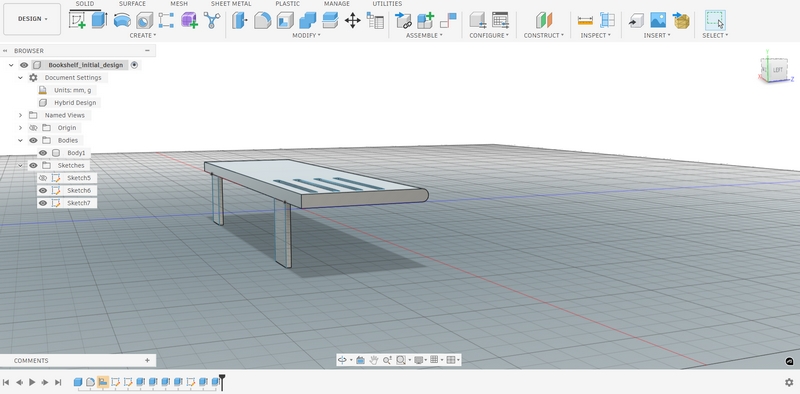
The next step was to create a slanted support attaching the vertical pieces to the base. This proved a little complicated because there were no surfaces in that area over which I could sketch the slanted pieces. However, after looking through the different tools, I found the Rib tool to be the closest to what I was looking for. When watching tutorials for the tool, I found a way to complete my base shelf design.
What I did was create two extra planes along the vertical pieces, over which I could draw the ribs. I did so by making the Origin visible, right-clicking on it, and choosing Offset Plane.
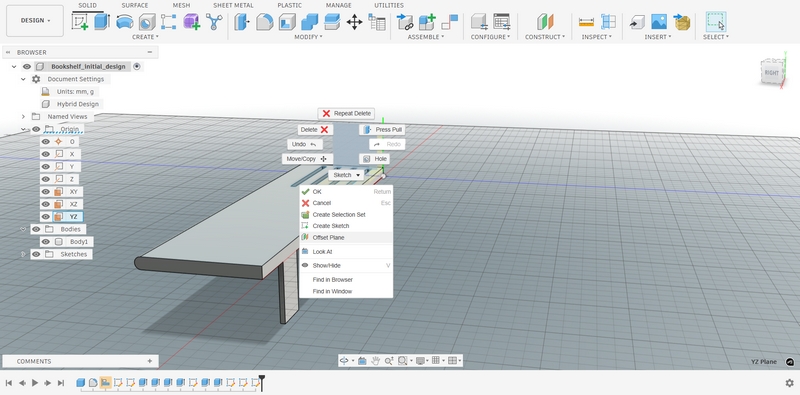
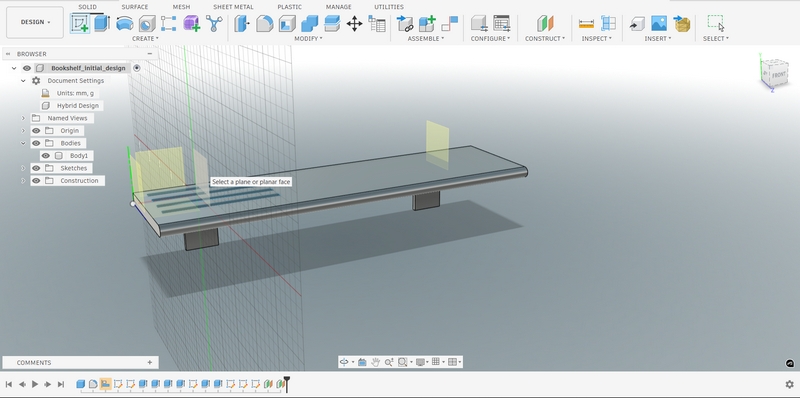
As you can see, I have added two extra planes along the vertical pieces. The next step was to open the sketch mode and draw a slanted line on each of those planes that would be the support. The lines did not need to touch the surfaces because they would be automatically extruded to them using the Rib tool.
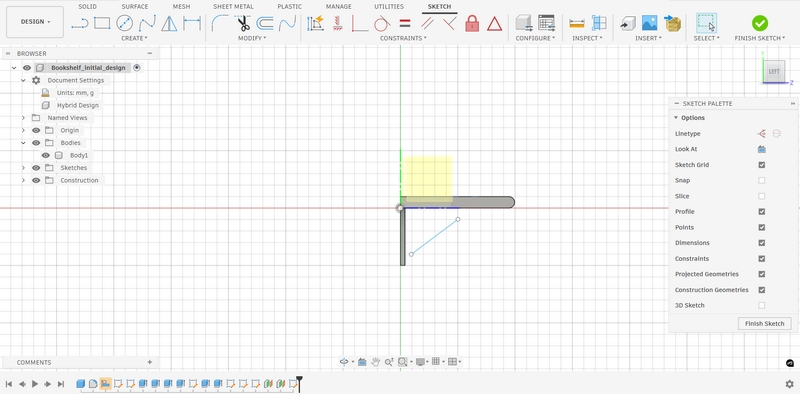
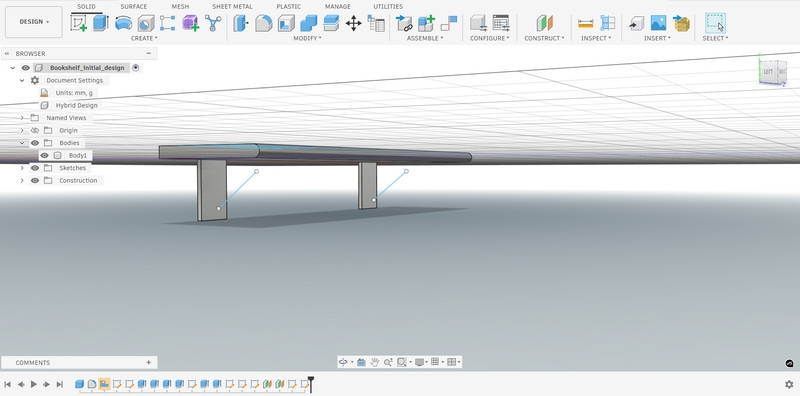
Finally, by choosing Rib and selecting the lines, I could create the slanted support for the base. By default, the rib was created outwards, so I needed to select the Flip option, finally completing the support.
I continued working on the design after week 2 and here is my final, tentative model:
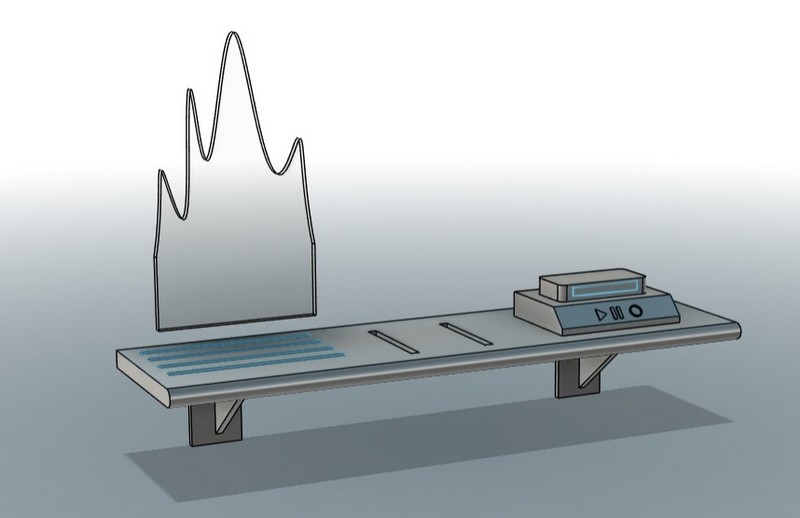
I have added a reading tracker, two slots for bookends, and a rough idea of a slottable piece that looks like nothing at the moment. Here is a simple video of the piece slotting into the base (I realised too late that it's smaller than the slot):
I attempted to make the shelf rotate, following this tutorial, but even after several tries, I was unable to make it work. I have still not found the issue, so I went with a simple zoom in.
Image and Video Compression
As there is a limit to the repository, I needed to heavily compress my image and video files. For this, I installed ffmpeg. I copied all videos to the ffmpeg folder, and then used the following command in the Command Prompt to reduce my file sizes.
ffmpeg -i input_video.mp4 -vcodec libx264 -crf 25 -preset medium -vf scale=-2:1080 -acodec libmp3lame -q:a 4 -ar 48000 -ac 2 output_video.mp4
As you can see, the size of the video went down from 6MB to about 1MB.


To reduce image size, I installed FastStone, another open-source tool. After inputting all images from the assets folder, and setting the desired quality to 100%, I converted all images to JPEG format and, from Advanced Settings, resized them to a maximum of 800x600 pixels.
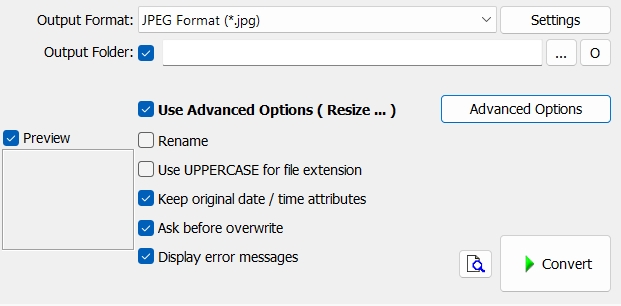
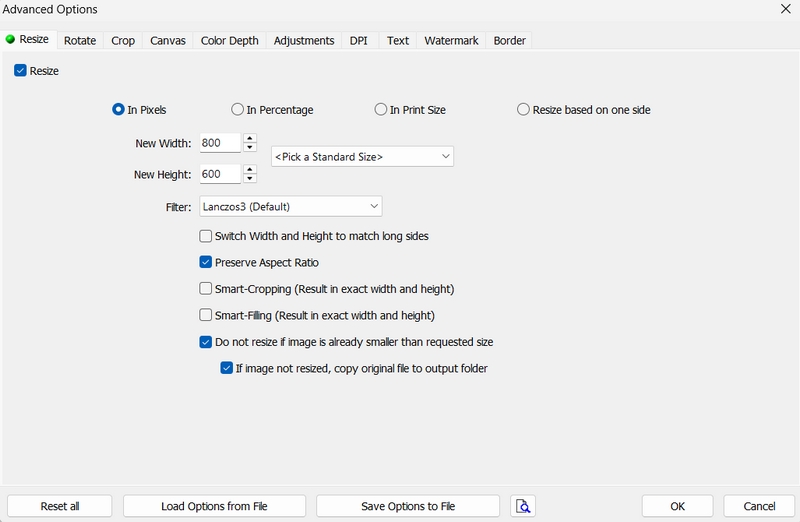
PNG files are generally much larger than JPEG files, so the conversion helped a lot in bringing down the size. Most of the images were around 500KB to 1MB, and after the compression, they went down to less than 100KB.
Design Files
GIMP Sketch
Adobe Illustrator Sketch
Adobe Illustrator Sketch SVG
Autodesk Fusion Design
Learning Outcome
- 3D Design
- File compression using ffmpeg
Reflection
Admittedly, this week was a bit frustrating for me. I struggled most with the 2D designs, both raster and vector, and I was unhappy with both of them. But I enjoyed learning how to design something in 3D. Since I am completely new to it, I was excited to learn and experiment with the different tools.